
Introduction
One of the biggest hurdles I faced when I decided to switch from Python to C++ to develop plugins for Maya was to properly setup the build environment and to actually compile something. Luckily I found this mini-series on “Compiling C++ Plugins for Maya with Visual Studio”. The series is an in-depth explanation of the whole process and how to properly use Visual Studio in combination with the Maya API. I highly recommend checking it out.
With the help of the above-mentioned videos, I was finally able to build my plugins, but because I already used PyCharm for a couple of years and was familiar with other products from JetBrains I wanted to use CLion instead of Visual Studio. I could not find any tutorial regarding the Maya API and CLion, but after some research and a lot of trial and error I figured out how to transfer the knowledge I gained so far and found a working solution. This article wont be an in-depth explanation of the Maya API, CLion or CMake and I can not guarantee that the setup I explain is any good, but it works and is actually pretty easy to setup.
Prerequisites
Visual Studio
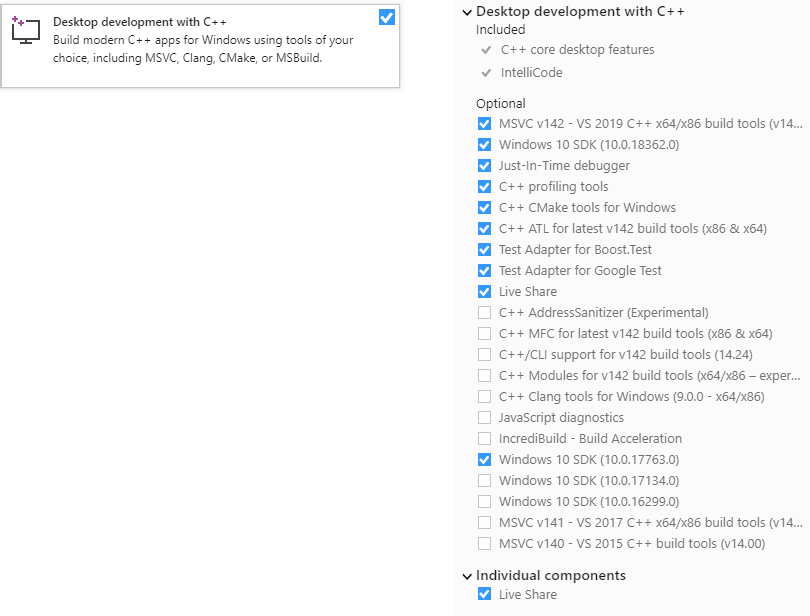
First we need Visual Studio – there is a free version called Community – with “Desktop development with C++”, “… C++ x64/x86 build tools …”, “Windows 10 SDK (10.0.18362.0)” and “C++ CMake tools for Windows” checked.
CLion
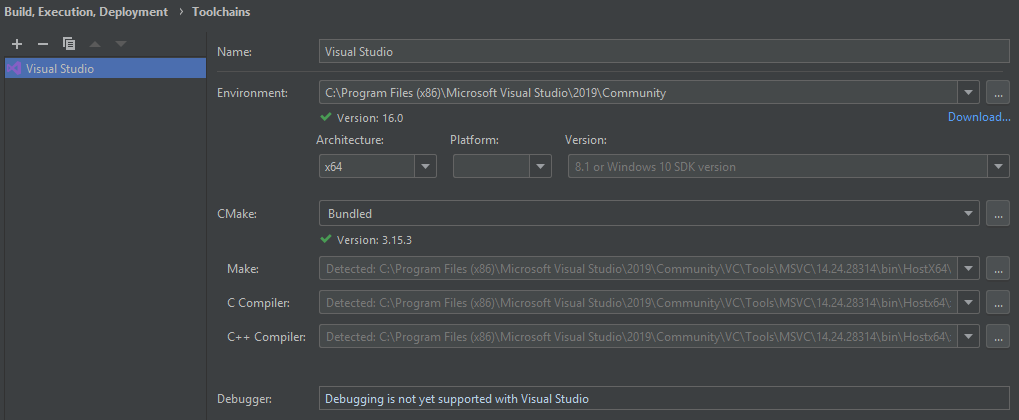
Next we can install CLion. Visual Studio should be automatically detected and CLion will configure the toolchain on its own.
Maya Devkit
Now we only need Maya and the Maya Software Development Kit. Setting it up is no big deal and explained in this official guide.
Project Setup
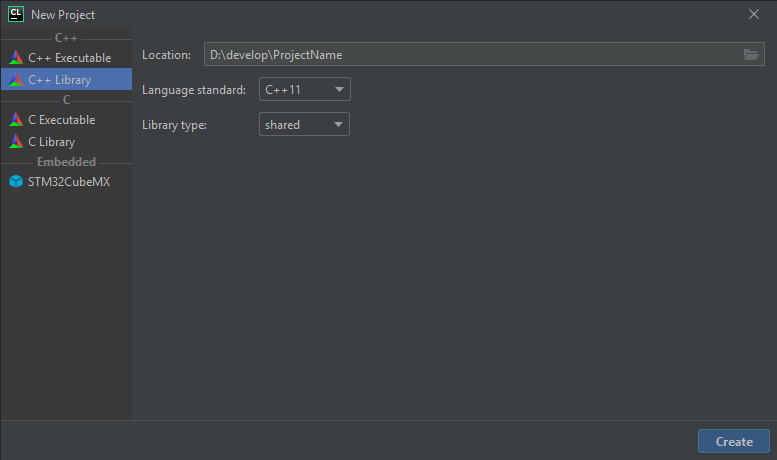
When everything is installed, we can open CLion and create a new project. Maya plugins are nothing else than a shared library but instead of the file extension .dll we use .mll. These are the typical settings I use when creating a new project.
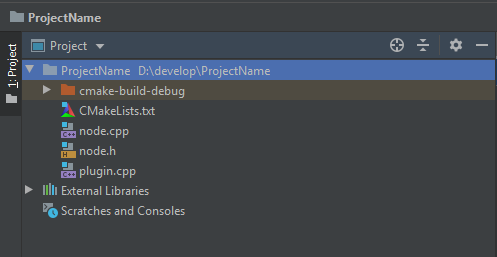
Now we can implement our plugin like in any other IDE. For a simple node plugin, this is how my project folder generally looks like.
CMake
Finally the most important part. To build our plugin we use CMake. If we have installed the Maya devkit properly, this will be easy. We only have to add a few lines to the CMakeList.txt. Here is an example of how the final file would look like for the simple node plugin.
cmake_minimum_required(VERSION 3.15)
project(ProjectName)

set(CMAKE_CXX_STANDARD 11)

add_library(ProjectName SHARED node.cpp node.h plugin.cpp)
target_link_libraries(
        ProjectName $ENV{DEVKIT_LOCATION}/lib/OpenMaya.lib $ENV{DEVKIT_LOCATION}/lib/Foundation.lib)

include_directories($ENV{DEVKIT_LOCATION}/include)
link_libraries($ENV{DEVKIT_LOCATION}/lib)
The first couple of lines until “add_library” are standard and needed in pretty much every CMake file. They should get auto-generated by CLion. The most important part is the line about “target_link_libraries”, here we can tell the linker about all the libraries, that he needs to know. OpenMaya.lib and Foundation.lib should typically be always included. For more complex plugins the list can get longer and other libraries of the Maya API like OpenMayaFX or OpenMayaRender need to be added.
If we modified the CMake file properly we should now be able to build our plugin. If everything worked and build successfully, we only have to copy the .dll file to a location where Maya searches for plugins and change the file extension to .mll.
On my GitHub I uploaded a complete example of a node plugin including the CMake file. I hope the information will be useful to someone. I still have to learn a lot so if anything is wrong or can be improved just let me know and I will update the article.
you saved my life!